
There’s a reason why people have been decorating gingerbread for generations. It’s fun, festive, and you can get really creative – even if art isn’t your strong suit. With the right tools, ingredients, and techniques (and tips from professional gingerbread bakers like us!), you can create your very own gingerbread masterpieces to enjoy – until they’re devoured, of course. This beginner’s guide contains everything you need to know.
The Gingerbread
Making the perfect gingerbread cookies requires a few key tools and ingredients. Before you get started, make sure you have: a rolling pin, cookie cutters, piping bags, piping tips (wide and small tips), and a spatula. You will also need gingerbread dough (the most important ingredient to remember!), royal icing, and any lollies, chocolates, sprinkles, or edible glitter you want to use as decorations.
Now, a well-baked cookie is your canvas in this instance, so you want to make sure your gingerbread is prepared and baked to perfection. As you roll out your dough, check to ensure it’s rolled out evenly – about ¼ inch thick. This is the best way to be sure your cookies all bake evenly, and you have a nice flat surface to decorate on.
Once you’ve used your cookie cutter to cut out the shapes, chill your cookies in the fridge for 15-20 minutes before baking to help them hold their shape. When they’re out of the oven, pop them on a wire rack to cool completely before adding any decoration. Unfortunately, your icing will melt all over a warm cookie, and we don’t want that!
(Psst. Alternatively, you can always buy your cookies pre-made and ready to decorate from Hosome. We bake them fresh and they’re always perfectly flat and chewy.)
The Icing
Now to the backbone of gingerbread decorating. If you’ve never made royal icing yourself before, it’s pretty simple! All you need is powdered sugar, lemon juice, and egg white. Lightly wisk the egg white and lemon juice together, then gradually add in your icing sugar. Keep whisking until it’s all smooth and combined.
Now, how thick you need it depends on how you’ll be decorating your gingerbread. The consistency can be adjusted for different techniques, for example: add more icing sugar for a thicker consistency to use for outlining and sticking down decorations, or add a little water to make it thinner if you’re spreading the icing across a larger surface area. Once you’ve got the right consistency, simply add a few drops of food colouring to get the colour you want.
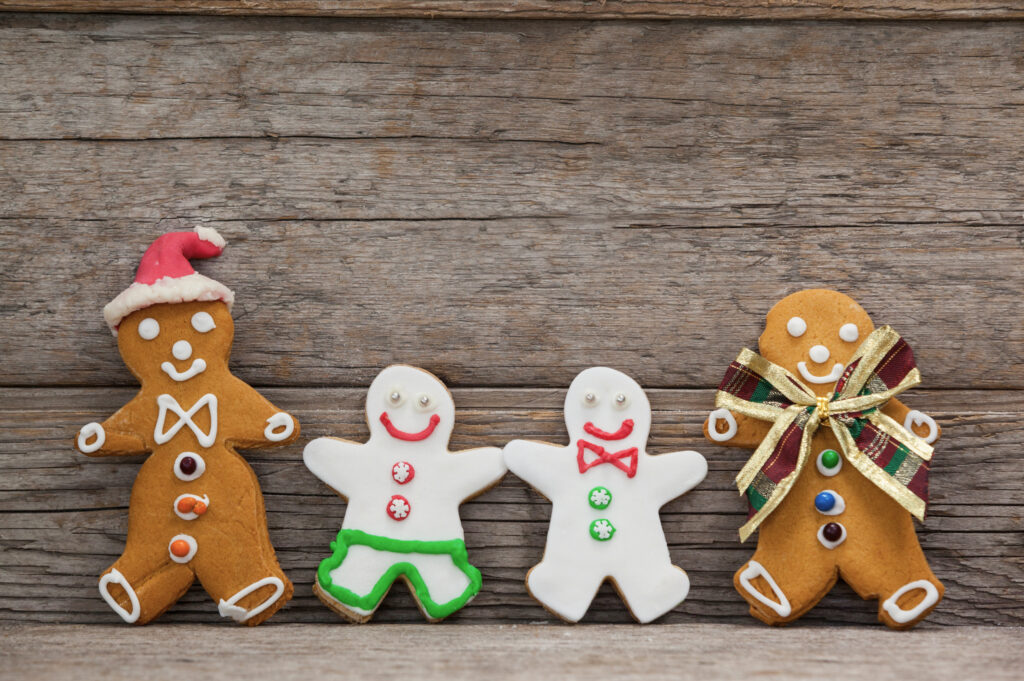
Decorating
Now we get to the really fun bit. While you have free reign to decorate your gingerbread however you like, we do have a few tips for making it look that little bit more professional.
To start with, use your thicker icing and a small, rounded piping tip to pipe thin lines around the border of your cookie and any other lines you like. Once that’s dried, you can fill the outlined areas with the thinner icing. To smooth it out and get rid of any bubbles, a toothpick is a great tool to have on hand here. Once that icing has set, then you can get to work on piping designs like dots and stripes.
Now you’ve got your icing on and set, you can start with the finishing touches. Add whatever you like – lollies, Smarties, licorice all-sorts, sprinkles, edible glitter – and attach it to your cookie with a little dab of icing. This is your permission to go nuts! When your decorations are stuck on, your cookie is complete. Show it off, use it to decorate, gift it to a friend, or eat it straight away – it’s up to you.
Have we convinced you that gingerbread cookie decorating is super easy and really fun? While we love eating our delicious gingerbread, a lot of the joy of gingerbread comes from decorating it with loved ones and the fun you have in the process. So, what are you waiting for? Roll up your sleeves, grab a piping bag, and get creative!